 Bài viết này thực hiện (hoặc lụm bài về đăng câu like từ các trang khác) bởi Việt Lâm Coder một YOUTUBER có tâm và đẹp trai siêu cấp vô địch zũ trụ. Các bạn đi ngang nếu được cho Lâm 1 like và 1 đăng ký kênh Youtube nhé !!
Here are step-by-step instructions to create and save a Google API key:
1Navigate to the Google Developers Console.
2Click on the “Select a Project” dropdown
3Within the dropdown, click on the “New Project” link
4Give your project a name, then click the Create button
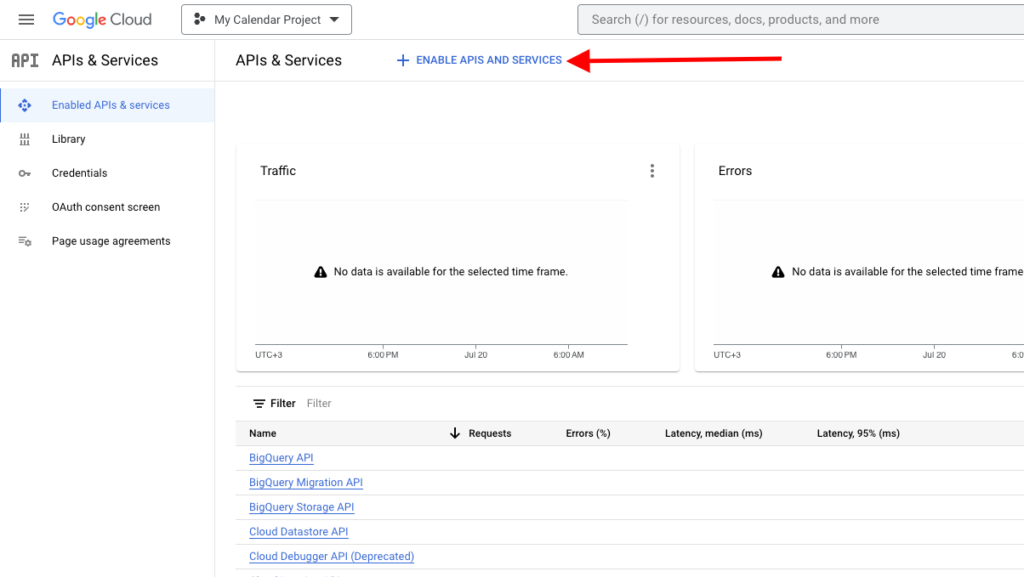
5From the “Enabled APIs and Services” section in the Google Developers Console Dashboard, click on the “Enable APIs and Services” link
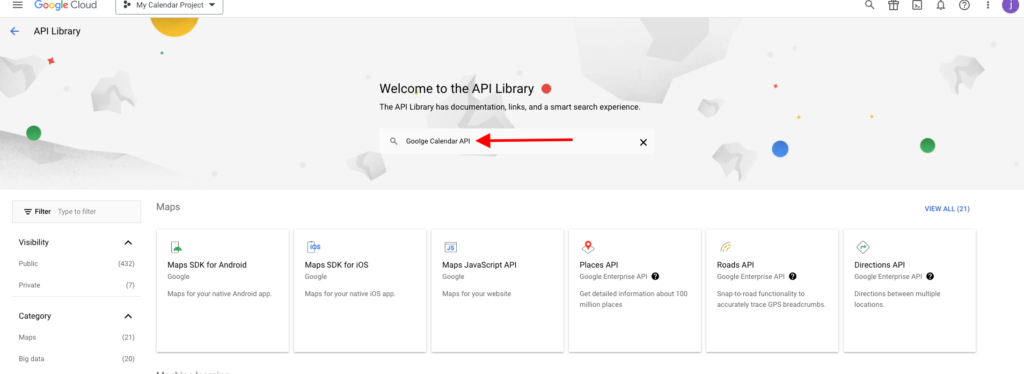
6Next, search for the Google Calendar API
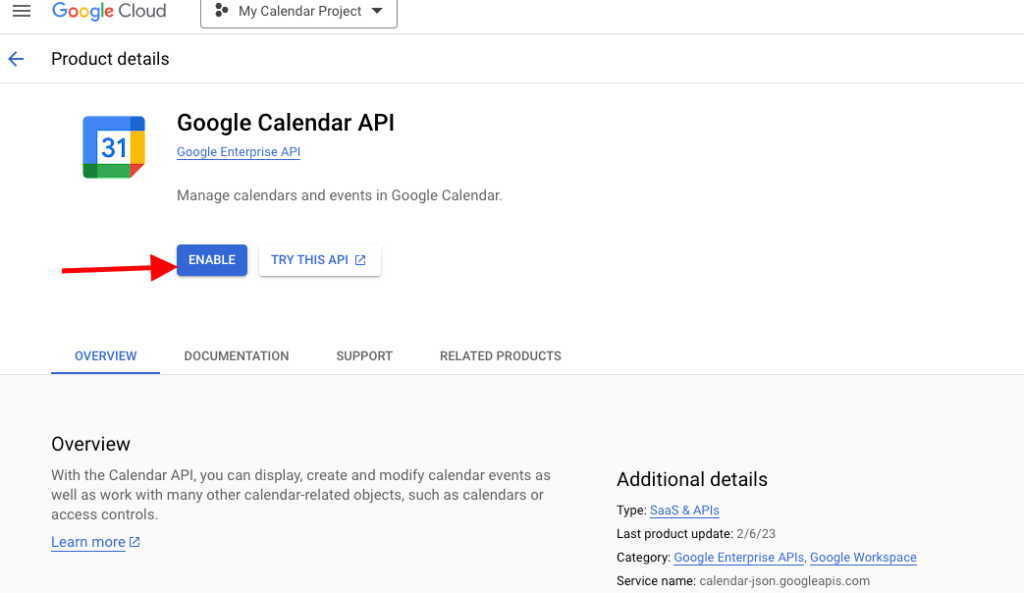
7Enable the Google Calendar API
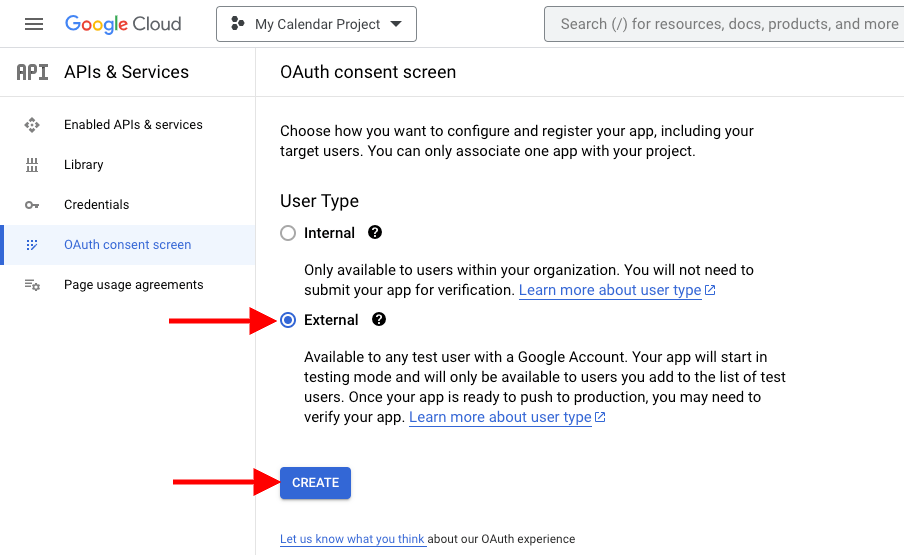
8Before you can create an API key under the Credentials tab, you will need to configure your oAuth consent screen. To do so, navigate to the OAuth consent screen:
9Select the user type “External” and click the Create button
10On the next screen, enter an App name (not important), User support Email, and Developer Contact Information, then click Save and Continue.
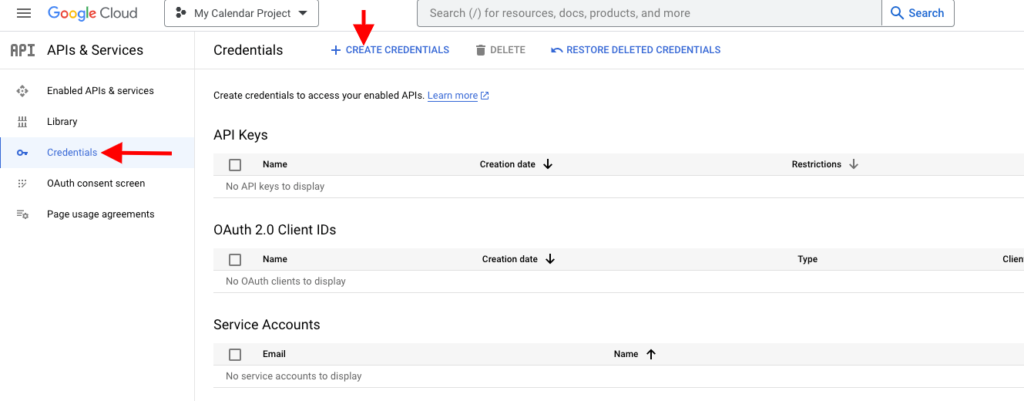
11Select Credentials under API Manager in the left-hand menu and click Create credentials
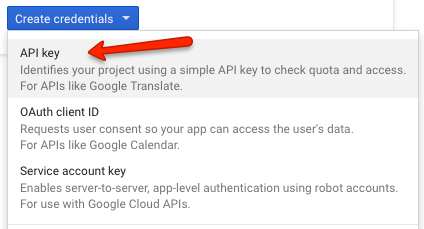
12Select API key from the dropdown
13 On the API key created popup, select and copy (Cmd-C or Ctrl-C) your newly created API key.

14 Now back on your WordPress dashboard, go to Calendars, then Settings from the menu.Enter your Google API key here, making sure you have pasted the exact key without extra spaces. Then click Save Changes.
In case of any error or problem, you may try obtaining a new Google API key by repeating the steps above before contacting support. You can generate more than one API key under the same project on Google Developers Console.
 Bài viết này thực hiện (hoặc lụm bài về đăng câu like từ các trang khác) bởi Việt Lâm Coder một YOUTUBER có tâm và đẹp trai siêu cấp vô địch zũ trụ. Các bạn đi ngang nếu được cho Lâm 1 like và 1 đăng ký kênh Youtube nhé !!


